Search This Blog

Tuesday, February 28, 2012

Microwave Oven Interfering / Killing WiFi


We had been having a lot of trouble with our home WiFi.    Finally found the cause.  My microwave.

Computers would drop connection, then often refuse to see the network until they were rebooted.   It was getting very frustrating and I was losing my reputation around the house of being in command of technology.

Our new TV, an LG 55LW5700 WiFi would hang and refuse to reconnect to streaming WiFi video.  I happened to discover that turning it off, back on, and then going to the settings menu and even though it said it was connected, entering the connection menu would reset it and make it work again

I upgraded my router to the best one I could find on the market.  I geeky open source one.
BUFFALO AirStation High Power N300 Gigabit Wireless Router & AP - WZR-HP-G300NH

Still nothing but problems.   Finally when working from home from the kitchen one day I used the microwave to defrost something and my laptop dropped connection.  VPN and all.   I finally connected the dots.  After a little experimenting I found the correlation was 100%.  Microwave running, WiFi slowed to a crawl and devices dropped off the network if the microwave ran for several minutes.  Clients often got into a state that they required a reset and manual reconnect to get working again.  The longer the microwave runs, the more devices just can't hang on any longer.  Surprising it took me so long to figure out, but with computers all over the house, far from the microwave and lots of people in the house it wasn't obvious.  It also turned out that our 2.4G cordless phone was getting static at the same time.  I never put 2 and 2 together.  Duh.

Obviously microwaves operate at the same 2.4GHz as cordless phones and WiFi, and you can find people saying they interfere but I've had microwaves for years and never had this problem.   If this was normal there would be a customer uproar.  I've heard that people who call manufacturers with this issue are told it's normal.   What I was experiencing wasn't normal.  Putting your laptop on top the microwave and losing a bar of signal is normal. This particular microwave has a serious microwave leakage problem.

Several forums said that changing the channel of the router would help.  Theoretically Channel 1 has the lowest frequency, and farthest from the offending microwave frequency.   Maybe, just maybe, it helped a tiny bit, but not really.  I tried every channel after that.  No help.  I changed every setting on the router I thought might help and nothing could stand up in the face of this interference.

This started when our old trusty 15 year old microwave stopped heating food.   I bought a Panasonic oven which lasted less than 2 years before billowing smoke and catching fire.  Then I bought the GE.  If you read microwave reviews, you can see that manufacturers don't build them the way they used to.   In a misguided effort to make more money, they have lowered the build quality to keep them under $200.  Their lifespan has been reduced from 15-20 years typical of appliances to 2-3 years typical of consumer electronics.  They figure you will want to buy a new one every couple years for $200 instead of once every 15 years for $500.  There seems to be no way to buy a good one, short of buying a commercial oven, which are hard to come by and have limited features.  So it's no surprise that something like this could slip out of the factory.

My microwave came from Target.  I don't know if all microwaves of this type are as bad, or if I just got a bad one.    However it seems to me that most of the GE and Panasonic ovens are really the same oven rebranded.   Sharp seem to be the same thing too.  The controls are exactly the same.  

This is the evil beast.  Still on sale.  Don't buy one.

GE Stainless Steel Profile 2.2 Cu. Ft. Microwave 


http://www.target.com/p/GE-Stainless-Steel-Profile-2-2-Cu-Ft-Microwave/-/A-13025192
GE Stainless Steel Profile 2.2 Cu. Ft. Microwave.Opens in a new window
Target's photo of the WiFi killing microwave.

Mug shot of the killer

This looks the same as Best buy has Model: JES2251SJ 


The microwave was pretty new, barely a year old and I didn't want to replace it yet.  We began to schedule when we ran the microwave versus using WiFi.  In a household of five with more than one computer a piece,  PS3s, Wiis, Xboxes, Tablets, 3DS this became intolerable.  Finally I cracked under the pressure and shelled out for a new microwave.  I didn't want to buy a new one and have the same problem, so I ruled out all Panasonic and GE microwaves.   Since I wanted a 1100W+ microwave with 2.0 cubic foot capacity the choices got pretty slim.

I finally bought this one, because it looked like it was actually a different oven than the one I had.

LG LCRT2010ST 2.0 Cu Ft Counter Top Microwave Oven With True Cook Plus and EZ Clean Oven, Stainless Steel - Optional Trim Kit Available


When I got the new oven, we ran tests.   Heated water in the old one and the new one both and used WiFi. HOoraY!  The new LG one doesn't cause the slightest problem.   The old GE one is a cold blooded WiFi killer. Money well spent.  Problem solved, very definitive.  We will see how this one holds up over time, because it probably isn't built any better than the GE.

Don't waste your money on a new router or signal booster.  The RF power this thing leaked was so high that it interfered with from across the house to a laptop right next to the router.  Wow.  Buy a new microwave and be done with it.   Searching reviews after writing this, you can see others complain about this microwave killing wifi.

Now what to do with a perfectly functional microwave that kills WiFi?  Craig's list?  I couldn't live with myself without disclosing it to a buyer.   My friend wants me to convert it into a police radar trap jammer, but that would be dangerous and illegal.  :-)


Saturday, February 18, 2012

Making the LED blink work on other phones


The LED Blink app has been out there a couple weeks, either getting rave reviews or being panned for not working.  It appears that just about every phone has it's own unique twist to turning on the camera LED.  Since I only have access to my own Moto Droid, and occasional chances to get friends to load my app (usually they greet such a request with great suspicion, even the techies) I have no way to test fixes other than to try them and see if people complain.  Yuck.

Lesson learned.  Don't develop a hardware dependent flashlight app as your first project.   Or if you do, restrict it only to the phones you know it works on.  Good luck with that, >900 devices out there.

The top phones using my app, based on the android dev web page
It appears that Moto phones top the list.  No surprise.  I've gotten reports and tried personally on one samsung phone and it didn't work.  However I have users on that platform according to my stats.  It's possible there are just a lot of those phones out there and they haven't deleted it yet.  Or maybe it works on one or two.

Some links to good posts on making the torch work on other phones.

http://stackoverflow.com/questions/6881004/setting-parameters-flash-mode-torch-doesnt-work-on-droid-x-2-3
http://code.google.com/p/torch/source/browse/trunk/src/com/colinmcdonough/android/torch/Torch.java
http://stackoverflow.com/questions/3878294/camera-parameters-flash-mode-torch-replacement-for-android-2-1

One of the things I was priding myself on was the lack of useless permissions on my app, but i may have to ask for camera permissions and add some of these statements.   I was going to add some of this code above to my app but I chickened out.  Until I have a phone in my hand I risk breaking something else fixing this.   So I'm going to let it lie there for a while longer.

Saturday, February 11, 2012

Hacking the LG 55LW5700 TV


I bought this TV from Costco after debating between the two models.    This post is about how to turn on some hidden features.

LG 55" Class (54.6" Diag.) 1080p 120Hz LED-LCD HDTV 55LW5700

Just a little philosophy first...
I like to buy TV's from Costco because they extend the warranty a year and will take it back without arguing if something is wrong.  I had a friend order mail order and the TV was delivered broken THREE times!  Screen was cracked and other horrors.  Each time he had to wait a week for the service guys to come and take it away.  A month long ordeal.  Not for me!  Buy TV's local.

Costco has the 55LW5700.   The 55LW5600 and 55LW5700 are not exactly the same.  The 55LW5600 is the TV you find everywhere else.   The cabinet is slightly different but the motherboard is the same, just different features are turned on.   All this should be true for the 47LW5700 and 47LW5600 too.

Link to the 55LW5600 that is sold by everybody else but Costco.
http://amzn.to/1Oe3V3j


The 5700 is missing a few features vs the 5600. No magic remote is included, but the Wifi adapter is! However you can just download an app to your phone to replace the magic remote.  And from what I hear it doesn't work so well anyway.

Apparently you can use the service menu to turn on other features and make the 5700 into a 5600.  It requires a universal remote according to these posts.

This has been covered a lot in other forums, but since this forum is for me to find what I want, here are the two best posts I found.
Configure your 55lw5700 into a 55lw5600 and turn on local dimming to match contrast. Add THX, Thumbnails and DVR capabiliity.
Borrowed from another thread. Program your remote to open the LG service menu:http openlgtv.org.ru/wiki/index.php/Access_hidden_service_menus_/_modes
Enter the PasswordPassword = 0413 or 0000 (use the original remote to navigate and enter values)
Option 1 goto> tool >change to lw56. 
This will fool the set into thinking it is now an LW5600, Next:
Option2 goto> localdim menu =1 (This turns on the menu item)
Finally:
Option4 local dimming =1
For saftey and not to corrupt the firmware, after any change exit the menu (simply click the button you programmed to access the menu to bring you back out) wait 10 seconds, power off the TV and wait 20seconds then power the TV back on...you have now basically turned the 5700 into the higher end 5600...cool eh?
Here some other very cool tweaks you can turn on:
Option3 thx & isf setting=1 (Adds the THX & ISF video mode like higher end models have. Not available on DLNA/MediaLink)
Option 5 Channel Browser Set to 1 to enable preview thumbnail grid of all channels, it may not work on US cable, noticed when enabled Korean words show up in the menu?
option5 or option 6 (depending on your specfic model) 3d thx=1
DO NOT SELECT THX MEDIA DIRECTOR ON ANY LCD TV IT CAN DESTABILIZE YOUR TV IT'S USED ON PDP.I WOULD NOT LEAVE IT ON IF YOU'VE DONE SO.
DVR: 
This TV has build in DVR functionality...all you have to do is supply the external USB drive. Basic instructions:
As always to get the really cool stuff "EZ Adjust menu"
Option 3 goto> DVR Ready Set to 1 (this enables Time Machine for dvr like functions on USB just need an external usb drive (not a stick) on usb port 1 
Plug in the drive...if it asks you if you want to use it, say no.Then go to the home screen, with 2 right arrow clicks you get into screen with time machine app, 
Enter in it and in it it shows new screen with prompt to start initialize process, you say OK and it formats drive - after that it becomes active but in that screen there is no scheduler/recorder - confusing. 
Go into regular program view mode, press quick menu and in the bottom line it should show time machine app box - and when you enter it it will open up recording option, scheduler, etc. Under inputs you now will see your USB and clicking it will show time machine screen and you can play those recordings.
5700 doesn't have Local Dimming but it can be turned on via the Service Menu. You need either a Harmony remote or the universal RCA RCR3273 ( $5.05 from Amazon and also available at Wally ) to enable this and other features like THX mode ! 

http://www.avsforum.com/avs-vb/showthread.php?t=1384595

Start by getting an RCA universal remote model no. RCR312WR. I got it from Walmart for $8 dollars. Then you have to hold the "tv" button while you type in this code = 11265. After that I pressed the "Guide"button and a pop up appears asking for a 4-digit passcode. That passcode is = 0413. And now the service menu will appear on the left side of the tv with a bunch of numbers and options. Now which options and settings that are safe I do not know. I do know which ones are to turn the Local dimming on and to turn on all the THX picture settings. Here goes, Option 1 goto>tool>change to lw56. This will fool the set into thinking it is now an LW5600. Next, Option 2 goto>localdim menu=1 (This turns on the menu item).Finally, Option 4 local dimming = 1. This is to turn on the local dimming, basically changing the lw5700 into a lw5600. To turn on the THX settings = Option 3 THX = 1. Go to Option 6 3d THX = 1. Now you have turned on the THX settings. For safety and not to corrupt the firmware, after any change exit the menu, wait 10 seconds or so, power off the TV and wait 20 to 30 seconds then power the TV back on. This should change your set in the lw5600 and added the THX options.

Found the remotes on ebay for a few bucks.  Walmart didn't have the models mentioned above anymore, although I'd bet that the ones they have would have worked.  But I hate going to walmart.  I got the RCR312W from ebay.

http://www.ebay.com/itm/RCA-SAT-CBL-TV-VCR-DVD-3-FUNCTIONS-REMOTE-CONTROL-RCR312W-CODES-INCLUDED-/230740748359?pt=LH_DefaultDomain_0&hash=item35b9386847#ht_7018wt_1225

http://www.ebay.com/itm/RCA-RCR3273-3-Device-Universal-Remote-Control-/290661216003?pt=LH_DefaultDomain_0&hash=item43acc22f03#ht_5430wt_1225

The remote came in the mail.   Made a slight mistake.  I bought a RCA312W not a RCA312WR.  Hopefully it makes no difference.  (from future self ... it DOES make a difference)

The section in yellow was me flailing to figure out why it wouldn't work, you can skip this part unless it helps you figure out the same thing.
The instructions in the second post above didn't work as written.
  • "Then you have to hold the "tv" button while you type in this code = 11265" 
  • Didn't work.  TV does not respond and the light on the remote turns off after 4 digits.
Found a site with the codes for the remote, RCA312W.   http://rcaaudiovideo.com/remotecodefinder/?sku=RCR312W&productType=TV
And the 5 digit code RCA tells you 11265 is on the list...

LG11423, 10017, 11265, 10178, 10856, 11178


I even watched the stupid video, and it say 5 digits.  The remote is clearly only accepting 4 digit codes.
A set of instructions is herehttp://audiovox2.info/docs/common/RCR312WR/RCR312WR_OM.pdf
Doing a code search the remote picked 1004, which is the correct code to control the TV.  But no service menu.
Frustration abounds.

Went back here, it gives the same instructions.http://openlgtv.org.ru/wiki/index.php/Access_hidden_service_menus_/_modesRCA remotesThis is for the following models: RCR3273N, RCR3283N, RCR412SN, RCR412BN, RCR4383N, RCR4258N, RCR4358N, RCR4373N, RCR4383N, RCR461, RCR612N, RCR473N, RCR812N, RCR815N and will probably enable ez_adjust menu only.Procedure
  1. enter setup code 11265,
  1. hit the GUIDE button

I could program my Arduino to generate the IR codes, but I've already spend more time on this than I wanted.  I'll throw that on my project list for the Arduino fans out there to do later.  I already have an Arduino IR remote control box I built for activating the sleep timer.
Based on the instructions, it seems the first "1" means TV.  2 and 3 are VCR and DVD, and 5 is for sat boxes.   I tried leaving off the first 1.  The remote accepted 1265 and will control the LG TV.  But the menu key doesn't bring up the password box.  None of the keys do!  It doesn't work.
Back to this thread to read the posts againhttp://www.avsforum.com/avs-vb/showthread.php?t=1384595
Found a video.  Hate video but watched it.
http://www.youtube.com/watch?v=GE2baLOcCKk&feature=youtu.behttp://www.youtube.com/watch?v=C2G1gw2FtJs&feature=relatedI have to figure out what the "magic button" is for this remote.  There is no P, S or guide buttons.

Looked hard at my remote versus the one I meant to buy.   Whaaa!!!  The only difference is that the W has no guide button.  Curses.  It has a "Go Back" button where the "Guide" should be!  The go back button doesn't open the service menu.
http://rcaaudiovideo.com/search/?sku=RCR312WR
http://rcaaudiovideo.com/search/?sku=RCR312W
My RCR312W:  Note to the upper left of the direction pad, a "go back" button, not a "guide" button.   Doh!

Now I have to buy another remote.  I guess another universal remote around the house won't go to waste.

Went back to ebay and bought a new RCR312WR instead.

http://cgi.ebay.com/ws/eBayISAPI.dll?VISuperSize&item=110820926194

And back to waiting for it to come.

My new RCR312WR.  See the Guide button.
Put in the 5 digit code 11265 on this one.  Hold the TV button and type it in.  It took the 5 digit code this time.  I'm on my way.

Went to the TV and pressed the guide button.   Finally!
Press guide and the code box pops up.   Type 0413

Service menu appears.    Pretty cryptic.  You can navigate with the universal remote or  the LG one

In the Tool Option 1, change the TV to a 55LW5600 by changing LW57 to LW56

Turn on the local dimming to improve contrast like the 5600

This is for the THX video setting to be enabled
Picture modes before enabling THX
Picture mode menu AFTER enabling the THX settings.  See the new options?
So in the end this is easy, it takes a $10 remote control (buy the correct one) and the 0413 password.  Done.  Enjoy!


Friday, February 10, 2012

Asus EePC 1005PEG replacing LCD screen


This Asus EePC 1005PEG netbook laptop got dropped off a bed onto a tile floor in a dorm.    It is less than a year old so I decided to try to save it.    This model has built in 3G networking, a rarity.

The right half of the screen is a rainbow of vertical lines that never goes away and never changes.  The left half works normally.  Wiggling, bending and opening, closing turning on and off had no effect.  Connecting the laptop to an external monitor it works fine.   So the video card is ok.     Once it was open like this I also wiggled the wire to the screen and pushed and prodded to see if I could see a change, indicating a break somewhere.  Nothing.  The problem is definitely inside the LCD panel.  That is actually good news.  So it looks like it needs a new LCD panel, it is not a broken wire or connector.

Face plate comes right off after removing rubber bumps and screws underneath

Half the screen is rainbow.  Faceplate removed and LCD screws removed
Removed the rubber bumps from around the faceplate of the LCD screen, which revealed 6 screws.   Removed them and then pried the face plate off.   Underneath is the LCD screen secured by 6 more screws at the corners.  Easy to remove.   You need a very small philips head for this repair.  I needed some tweezers to hold the small screws, but that is the only tools.

The LCD has this sticker on the back that you can see once it's loose with the part number of the LCD.  It reads hsd100ifw1  Rev 0-A05  HannStar.

LCD panel part number sticker on back.

There is a ribbon cable that connects it to the rest of the laptop.  I don't know yet how it comes out, but I'll save figuring that out until the new part comes.


Googled the hsd100ifw1 part number.

Found it refurbished for $45
http://www.antarespro.com/6336613-item-HANNSTAR-HSD100IFW1-PB-R---+10_+HannStar+HSD100IFW1.aspx?sgd=330d350d289d334d348

New for $62.15 or $50.99+3.99 shipping.


The part has a revision code, on mine it said A05, and the one I bought said F01.  Hopefully there is not any real difference between revs.  I couldn't find an A05 for sale.

I ended up going with the new one, fulfilled by Amazon shipping, because I thought I'd have a better chance of getting if faster and didn't want to accidentally buy from an overseas vendor masquerading as a US vendor. They will try to ship if from China and sometimes you never get it.  I don't know how the postage works from China, but it happens all the time.

I'll update this post when the new screen comes....
The new screen from Amazon came the second day...

Here it is in the wrapper.  


Once I had the new screen, I realized there were some metal brackets on the sides of the screen held by two screens that had to be transferred from the old screen to the new.


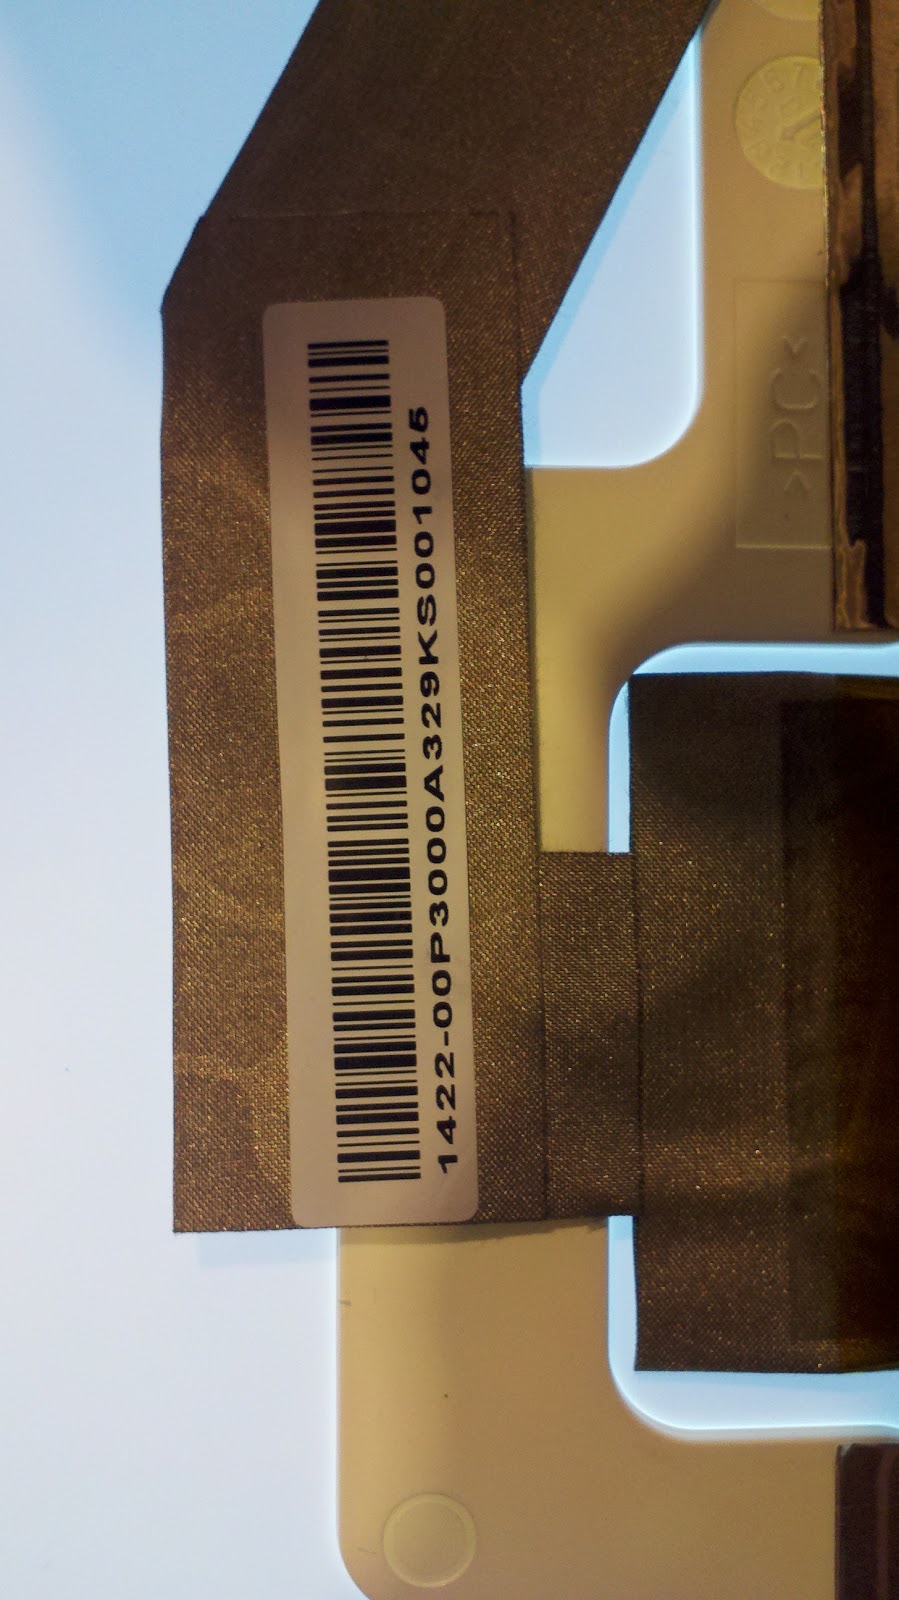
This is the sticker on the new unit.  Note that it says hsd100ifw1  Rev 0-F01.  The rev is different.  Turned out it didn't make any difference.


I peeled up the black tape on the left and the clear tape over the end of the ribbon cable.   Once that was done I could pull the ribbon cable straight back and there was a small black connector on the end, the cable pulls right out.

Peeling up the tape 

I saved the tape and reapplied to the new unit.  It wasn't hard at all I pushed the ribbon connector into the back of the new LCD screen.   It pushed in easily.  I powered up the PC at this point before re-assembling and Ba DA BING!  It works!
Powered up before i put back all the screws.   W00t!

It took me over an hour to put the thing back together again, I had put the metal brackets on upside down, and struggled and struggled to get the new screen to fit in the case and line up the screens.  It took me a while to realize my mistake.  That and a lot of really small screws in awkward places.   Really the most difficult part of this whole repair was reassembling the unit.   But if you are careful and moderately dexterous, you can do it!

Back together, screen working perfectly, good as new for $62.

Monday, February 6, 2012

Android LED Blink application doing well in the wild


The LED blink app is a week old and I thought I'd share how it's doing in the wild.  I was surprised by how many installs it got so quickly.  Of course it is free and doesn't load you full of ads, and does something useful, so why be surprised that people picked it up?

Link to my published apps (there is only one at this time)
https://market.android.com/search?q=pub:Siliconfish

Link direct to the app
https://market.android.com/details?id=sifish.android.blinky&feature=search_result#?t=W251bGwsMSwyLDEsInNpZmlzaC5hbmRyb2lkLmJsaW5reSJd

In one week I got 172 installs on 42 different devices!!   I got only one rating, but it was 5 stars!   Far better than I ever dreamed.  I thought I'd get maybe 2 installs because there are so many LED flashlight apps our there.  I didn't get any complaints that it didn't work on certain phones yet, which I kind of expected because I understand that the camera flash is a bit tricky on some devices and the emulator doesn't have an LED, obviously, so there is no way to test.

I talked a friend with a samsung captivate glide phone into installing it.  It didn't work.  Depressing.  The light never came on.  I will have to exclude that phone from seeing the app.  Hopefully his phone is in the minority, I'd think I'd get some complaints.

Here is the line from the app developer page.  Wow!


172 total installs (users)
42 net installs (devices)
Statistics
Free
Errors
https://market.android.com/publish/gwt/clear.cache.gifPublished
Advertise this app


I got one email about the screen not scrolling to see the ON button.  It was great input.  I didn't test it on really small screens so I took his word for it, and added a ScrollView wrapper around the whole menu.  That worked nicely to fix the issue.   I did an update and realized this had the unintended consequence of making the virtual keyboard pop up all the time.  I found a focus line to add to the manifest to fix it on stackoverflow.   Updated again in short succession to fix that bug.

I may do another update soon to improve a few things, my understanding is that doing updates will raise your standings in the search engine, so I want to pace them out.
  • DONE - Update to fix the timebase of the flashes, right now if the loop takes too long, the time keeps getting stretched forever, always running a bit slower than advertised.  I'm going to only take the time once and calculate the flashes from that instead and see how it works.  That will keep the average flash rate truer to the advertised value
  • DONE - Fix the information screen text, it says version 1.0.  Oops.  Should have used a string for the version number.
I'll upload the update shortly as soon as I get time. 

In the last day it went up to 250 installs, but I got a couple more emails that it didn't work on various Samsung, LG and HTC phones.  That is probably a lot of the market.  Got a one star slam "it sucks" for not working on his phone.  Bummer.   I don't know how I'm going to test this, the emulator doesn't have a flash light so it doesn't show me if it's working.  For the moment I'll have to exclude those phones from the app until I find a way to improve things.

The lesson here, is don't make apps that rely on the camera flash, because phones work differently and it is really hard to test them.

Sunday, February 5, 2012

Replacing the laser in ANOTHER Wii

My daughter's Nintendo Wii started refusing to recognize that a disk was present, after a period of randomly crashing and freezing and  "The disc could not be read".  I know just the ticket.  Replace the laser.  I pulled out my notes from doing this last time.  I'll follow my own instructions and improve them as I go.

http://blog.workingsi.com/2011/01/replaced-laser-in-wii.html

The first step was to buy a replacement laser. I got this one off Amazon so I'd get it quickly. Prices and vendor's vary and there is no way to know quality, so I spend an extra $3 to buy it from somewhere I might have recourse.  They all come from low budget overseas sources.  It came in a three days.   Funny, looking back, without trying I chose exactly the same vendor and paid the same price last January.  At least I'm consistent.


NOTE!  This part no longer comes with the Nintendo screwdriver.   You will have to get one of those, no two ways about it.  It looks like a Phillips head with three instead of four wings.  Here is an example.  I didn't buy this one, I already had one.


Quoting myself from the previous post with some background info...
This happens because the lasers used for reading discs age.  They get weaker and weaker the longer they are used.  Eventually they are too dim to work. 
This repair is not for everyone. It takes a Nintendo triwing screwdriver and a jewelers Philips head screwdriver set, small pliers, soldering iron and I use a magnifying lamp (but I'm old).   If you are fairly mechanically inclined, careful keeping track of the screws, cables, etc. You can do it.  It took me about two hours and I do this kind of stuff all the time.  If this is your first it will probably take a lot longer.  Otherwise go for buying a replacement drive, they cost 60 bucks and up, but you avoid the tricky parts of the repair, the soldering, and almost all the ribbon cables.
This Wii was one of the original Wii's, we bought it in November 2006 for Christmas, stood in line and everything.  He plays it constantly, and leaves it on all the time.  We had already sent it back to Nintendo once for this problem when it was under warranty and they repaired it.   I recommend if your Wii is fairly new to go this route.  Nintendo is one of the better companies out there for repairing stuff for free, even if it is marginally your fault or a little past warranty.  He didn't want to have a new one, because of all the saved games and downloads on this console.  We had to fix this one and I'm cheap and adventurous!

This Wii in this repair job is circa 2008, and it's time had come.

I went back to the guide I found before, and it was even better than before.
http://dodisdodat.com/tutorials/repair-guides/100-fix-it-yourself-how-to-open-a-wii.html
So i'll skip taking pictures since this one is already so good.  Follow it exactly.

Wii opened to the point where the instructions leave off.  DVD drive is loose
That guide gets me to the point where the Wii is open and the DVD drive is loose.   Back to quoting my previous post
When you lift the drive there are several ribbon cables that you have to remove.  Some plug in, others have tiny clamps on the board that you have to slide back or flip up.  This is classic Nintendo construction.  The ribbons look much more fragile than they are, but still be careful.
Lifting the DVD drive you see two cables connecting it.   Remove the wire, leave the ribbon but be careful not to twist or strain it.
In this Wii there was only the flat ribbon and one white header.  I unplugged the header by gently pulling on it.  I'm going to try leaving the ribbon connected, it is long enough.
What you see once the DVD drive is out of the way.  The green circuit board is the one you have to  lift.
To remove the laser from the drive, you have to take the circuit board up by removing some screws, and then a couple more ribbon connectors.   Then there is a sheet metal cover that you have to pry off.  It has four clips on each side.  It was very difficult to get off, the best way is to stick a screwdriver in from the other side.
Removed the circuit board screws and unclipped the laser ribbon cable by pushing the little clip up on each side.  Same for the other ribbon on the other side.  Pulled them out gently.  Left the other wires connected.  Had to unclip the wires to the motors from under the plastic hooks to lift the board.

Remove the black tape holding the cable.  Save it to re install later. The sheet metal laser cover is a pain.  It has a tab at each of the four corners that hooks over a plastic bump.  It also has a screw on the left side that has to come out.  You have to pry each corner off it's bump, some by sticking a screwdriver in the bottom.  Finally when you have jiggered each loose, the cover slides towards the edge about 1/8 of an inch and then comes off.  It tends to stick on the various motors and such.
Here you see the sheet metal laser cover partially removed.  Remove the screw .
Finally you can see the laser.  You remove the two screws near the edge that appear to do nothing.  They allow you to slide the sliver rails that the laser moves on out of the edge of the case.  Take the old laser out, transfer the white plastic triangle that engages the gear from the old laser to the new.  Slide it on the rails and push the rails back in.   
This went smoothly.
Laser finally revealed.  Screws to remove rails are just at the bottom left and right corners of the lasers at the ends of the rails
Rails being pulled out from the side after the screw holding them in place was removed
Transferred the white plastic triangle gear thingy from the old to the new laser.
Note!  There is a tiny solder blob on the ribbon cable of the laser.  This is protection from electrostatic damage.  You will see in the old laser that this blob is divided.  You need to use a soldering iron to heat this blob and flick it off.  Otherwise the laser will not work. 
Shows the place the solder blob is, if there is one.  It is the silver spot just right of the  sticker on the old laser.   It shorts two tracks together.
There was not a solder blob on this replacement laser.  But check for one because you must remove it if there is.  

Put it all back together.   Start to finish 1 hour 45 minutes, including the time reading the web and writing this blog.  I was also interrupted by kids and cats several times.  Is it done yet Dad?  Of course I'd done it once before.   This blog is slightly better now.  Got one thanks Dad, it works.


Tuesday, January 24, 2012

Debugging and Publishing the Blinker App


For entertainment I decided to publish a real app to the marketplace.  I wanted to see what it was like, if there were any unknown obstacles, and see if anyone used my app.   I started with my hello world blinking LED app and polished it up into something marginally useful to others.   Easiest next step was an app to completely control the LED flashlight, blink, pattern setting, speed setting, strobe light, maybe dimming.   It would be useful as a toy and as an emergency signalling device, a strobe light for video, whatever.  Here was my starting goal list of functionality:

  • Flashlight
  • Blinking light
  • Party Strobe Light
  • Warning Hazard Light
  • S.O.S. signaler 
  • Custom LED pattern modulator (for hobby use to transmit data)

I signed up for the Android market as a developer.  Google "android developer", follow the links and fill out the forms.  Done.  That cost $25. Also signed up for the Amazon market so I can publish to the Kindle.  Signed up for  https://developer.amazon.com/help/faq.html#KindleFire.  Have to watch out, amazon costs $99/year after the first year, so this may not last as a hobby.  The first year is free however.  Amazon is stricter, we will see if my hobby app can get through.  I may use ads just so I can see how that works.  I expect that I'll earn up to $1 based on my experience with the web.   No pipe dreams of wealth with this one.

To publish I felt I had to have an app that was useful, with a clean GUI, and minimal bugs.  I didn't even look to see how many other apps were there that did the same thing, that would be too depressing.   This is a hobby project so I have to let myself get excited by the creation.  Until you have worked something through to the level that others can use it, you don't learn all the lessons.

This turned out to be a trickier app than you might think.  The trouble is, you need processing power to blink the light, but you don't want to tie up the GUI thread with marking time or the phone appears hung.   So I had to learn about child processes and about other events that happen on the phone platform like randomly hitting the home or back keys, screen rotation, keyboard opening, etc that your app and it's child process have to deal with.  Asynctask would run amok if not managed well.

There is a lot of "artwork" to building an app.  You need an icon, button layouts, backgrounds, etc that make it look professional.  I probably spent as much time with this as making the code.

Implemented a GUI, in the process learned how to used radio buttons and toggle switches.   Tossed in the basic blinking functionality and then entered the "development loop" of adding functionality, debugging glitches, crossing off items on the list and adding more items as ideas, issues, etc emerge.

This would be my PCR list if this were done at work.  Since coding is not a spectator sport, I'll not write the running blog for this development as I do with hardware.  For anyone starting out, this is a simple and productive way to work on a complex task.  You make a working list of all the things to do.  Then you pick one and do it.  If anything new comes up while you are working on that task, just add it to the list and don't stress about it.  When you finish a task, mark it done, smile, and pick another task, either easy or hard depending on how much time you have and how deeply you can think at that time.  If you stumble across information for a task while working on another one, don't switch gears, just drop some notes in the list and keep rolling.  Eventually everything on the list is done or you decide you don't need to do it.

PCR working list
  • DONE - lay out GUI and hook up buttons
  • DONE - Disable editing pattern on the presets, custom field allows editing 
  • DONE - custom has no pattern, starts with whatever is there
  • DONE - Enforce hardware has a camera flash before downloading
    • Looks like i just need the uses-feature line in my manifest
    • <uses-permission android:name="android.permission.CAMERA" />
       <uses-feature android:name="android.hardware.camera" />
  • DONE remove extra permissions
  • DONE - on off button out of sync if exit and come back, need to check isOn at start
  • REJECTED - Remember the settings from use to use - Not doing, it causes too much trouble
  • DONE - Add the blink rate variable, auto set it for preset
  • DONE - Add the rate slider and figure out how to control it
  • DONE Force the screen to be vertical only because buttons go off the screen in horiz
    • Add android:screenOrientation="portrait" to the element in the manifest 
  • DONE - Set up blinking loop for any length pattern
  • DONE - Debug the thread start and stop and not lock up phone while blinking
  • DONE - Now I have to cancel the task when the user wants to stop the blinking
  • DONE - Sort out glitches with on/off toggle switch
  • DONE - If user exits without turning off blinking, it never stops - put a variable in the while loop of the child thread that kills it on exit.  
  • DONE - Add the information screen pop up text window
    • Toast is a function for doing this sort of thing
  • DONE - Add an epilepsy warning about strobe light 10Hz for less than 30 sec
  • DONE - longer text descriptions for choices on screen
  • FUTURE - Investigate brightness.   Possibly write a PWM loop to dim the LED.  Add a brightness control.
  • DONE - Make an icon - more on this below, it was a doozy
  • FUTURE - Investigate running strobe at the same time as the video recorder, either by backing out or by invoking it for strobe video.  This is an enhancement, probably for a later release, this causes all sorts of problems because the child blinking thread runs amok if I leave it going when I exit the app.  I'd need to call the camera from within my app.  Too much function for now. 
  • FUTURE - Button list is getting too long.  Can I enable scrolling for small screens?  
    • Looks like ScrollView does this, have to set up a frame
    • for now i'll leave it portrait only
  • DONE - Divide by zero on rate setting
  • Check frequency on the scope to see if it is accurate
  • DONE See if there are any color or style easy things to make it look better or different
  • DONE - Downrev app requirement to 8 (2.2) to include more devices
  • DONE!  Eliminate errror when user exits with the light still on, coming from onDestroy or figure out how to kill the child thread without any blood or warning messages.  This was a tricky one.  super.onDestroy() cleaned it up.  not really sure what this does, but it worked.
  • DONE - Screen rotation and opening keyboard is hosing the application by restarting the thread
  • DONE - Move the on button to the bottom
  • FUTURE - Look into how to make a separate horizontal layout
  • DONE - Solid pattern has some flicker - maybe make an override to skip the loop and turn it on straight - was due to double starting the thread
  • DONE - Custom pattern entry has stopped working - resent pattern to buffer when toggle pushed
  • DONE - Getting some new random crashes with monkey button pushes, possibly from spawning duplicate threads, seems to happen when going to a shorter string from a longer one.  Added the thread kill variable to the blinking loop, shuts down faster now.  Very stable.
  • DONE - maybe a cool chip photo for a background?
  • add some instructions on pattern setting in the information toast popup
  • DONE - add some info - mostly unsupported but adfree notes
  • DONE - Get the rep rate slider range and values to be realistic
    • rework here caused some divide by zero problems.  need to clean up the values of the timer and Hz and protect against out of range settings
  • DONE - Stretch the stobe light duty cycle and run it faster
  • DONE - Make the menu text a bit bigger
  • DONE - Bring down the contrast on the background picture to make it more readable
  • DONE - Simple Downrev of code level in manifest won't work, because package in source is 2.3.3.   Either change it back to 10 or figure out how to change the target in the source
  • DONE - some nasty bugs with crazy precsion being displayed from the rate calculation.  cleaned up
  • DONE - fast strobe lights you see an occasional hiccup, probably because the phone interrupted the thread and stole some milliseconds.  
Now I'm pretty happy with the app.  It's stable and it does what it is supposed to do.  I can't crash it by pushing buttons on the phone, opening the keyboard, changing settings like crazy, etc.  I'm going to try to push it to the android market now.


Requirements enforced by the Android Market server:
  1. Your application must be signed with a cryptographic private key whose validity period ends after 22 October 2033.
  2. Your application must define both an android:versionCode and an android:versionName attribute in the <manifest> element of its manifest file. The server uses the android:versionCode as the basis for identifying the application internally and handling updates, and it displays the android:versionName to users as the application's version.
  3. Your application must define both an android:icon and an android:label attribute in the <application> element of its manifest file.

Got the versionCode and versionName.  Now the icon.  Wow.  A lot of artwork to do.
http://developer.android.com/guide/practices/ui_guidelines/icon_design_launcher.html#icons_in_market
https://support.google.com/androidmarket/developer/bin/answer.py?hl=en&answer=1078870

You have to make an icon of several different resolutions.  I tried scaling a jpg photo and shapes in GIMP and it didn't work well at all.  At low resolution and on the phone screen it looked really ragged and unprofessional.   I was using GIMP and the image scaling function and saving at the lower resolutions.   Finally I tried a simple drawing with some texture in power point.  Then I scaled the picture in power point and copied it into the GIMP drawing, over and over again for each resolution.  That worked pretty well and it looks good.  On the phone screen it stands out like a little hazard flasher auto button.


Collected a couple screen shots that are required,  by doing an alt printscreen of the emulator and pasting it into gimp.


Now to figure out how to sign the app.  Found a couple links
http://developer.android.com/guide/publishing/app-signing.html
This seems like a weird and mysterious process.

However it looks like Eclipse  File->Export to an android app presents a form to fill out to make the keystore.   I made a separate directory for this since I had no idea what I was supposed to do.   It seemed to work without doing all the command line stuff.

I walked through the android developer upload page.  I had to scale my screenshots with gimp to 480x854 get them accepted.    A bit of fiddling with the pictures and up it went!

Here is a link to my app list, I will try installing it from the market and see if it works.

Available in Android Market

I published the app and it showed up on a web search the next morning.  I dont know how long it actually took since I went to bed, but it wasn't instant.  Must have been more than an hour.

I cant find the app on the android market from my phone.   When i went to the web link above from my phone, it said my phone WAS NOT COMPATIBLE!  Whaa?  I developed it on that phone.  Something is wrong with my app requirement settings.

Google made a page for the app.  It says I need Android 2.3.7 to install!!! how did that happen?  It looks like since I picked "10" as the build level, it set the requirements to the highest rev that is release 10, which is 2.3.7 not 2.3.3.

https://market.android.com/details?id=sifish.android.blinky&feature=search_result#?t=W251bGwsMSwyLDEsInNpZmlzaC5hbmRyb2lkLmJsaW5reSJd

I went back to downrev the build of the application to 2.1 in eclipse.  That should cover the vast majority of devices.  Right click on project name, Build Path->Configure Build Path->Android and the list of Project Build Targets shows up.  Change the check mark to a lower rev.  Took a while to dig that out of the GUI, but once I found it, it was easy.

Next I had trouble with the keystore, it refused to export the application again.  It turned out there were some errors in the layout.xml file, the "match_parent" keyword didn't work in Android 2.1 and had to be changed to fill_parent.  Once that was cleared up, i could re-export the app.

Discovered I forgot to update the version number when I went to publish.  Had to export again.   After that I still couldn't see the new rev in the app market.   Turns out I had to activate the new release, and de-activate the old one due to the conflict in Android rev support.  

Arrrgh.  Still can't download the app to my phone.  After about an hour, the new rev showed up when doing a web search for the the app.  But I can't see if from the phone and the label says the app is incompatible with my Motorola Droid 2 GLobal.   Whaaa?

Maybe it has something to do with my hardware permissions.  The FLASHLIGHT permission seemed odd, although it works when directly installing.  On the android dev site it seems to be
android.hardware.camera.flash
http://developer.android.com/guide/topics/manifest/uses-feature-element.html
This page showed some different syntax
http://www.linuxforu.com/2011/10/android-app-development-part-5-hardware-and-sensors/

Still going nuts.    Can't get the app to show up on the market as compatible with ANY phones.   This post had some more ideas.   This is something stupid but I don't know what it is yet.
http://stackoverflow.com/questions/5053507/my-android-app-shows-as-this-item-is-not-compatible-with-your-device  After days of fiddling I thought I finally figured out the problem.  It was the  android:screenOrientation="portrait"  line in the manifest http://forums.whirlpool.net.au/archive/1771380.  There is some bug in the compatibility that makes the market think that phones with ONLY portrait mode can use the app.   Lame.   However that STILL didn't get me past the FLASHLIGHT filter. 

The only thing i can seem to publish is a version with the FLASHLIGHT permission stripped out.  making the app totally useless.   So I have an app that works great on my phone, but I can't seem to publish it.  FAIL.   I'm going to put this on the back burner and move on to another app, since this ceases to be fun.

Update!!!!! HOoRAYYYYYYY!  W000T!  By giving up for a day and working on something else I thought of something else to try.  Not only did I have a permission line, i had the line in my manifest that says <uses-feature android:name="android.hardware.FLASHLIGHT" />.   I deleted that, to see if the android market added it back in, and it didn't!  Plus the app still works fine.  Now I show on the dev console as being compatible with 945 devices.  Hooray again, i finally can publish the app.

Amazon app store rejected my app, said that the light didn't turn on.   Lies!   However it is on market now.

In the process of looking for my app in the store, I saw that there are probably 1000 apps to do similar tasks.   So many in fact that I have to search for pub:Siliconfish to even find it amongst the clutter.  I didn't see one exactly the same, and the world probably doesn't need this app.  However I had fun, and I learned a lot, so the project is still a success.    On to bigger fish!